Showing posts with label Software. Show all posts

Thursday, October 15, 2009

New Design Studio and Gypsy Update! Also, Halloween Crop with Gypsy Giveaway, New Sneak Peeks of Mini-Cartridges, and more!

Have you heard? There's a new update for the Design Studio software! You can see the new Destinations cartridge on the Design Studio update also! Woo Hoo! Click HERE to update your Design Studio software! AND, be sure and update your Gypsy because there is a new update for it also!!


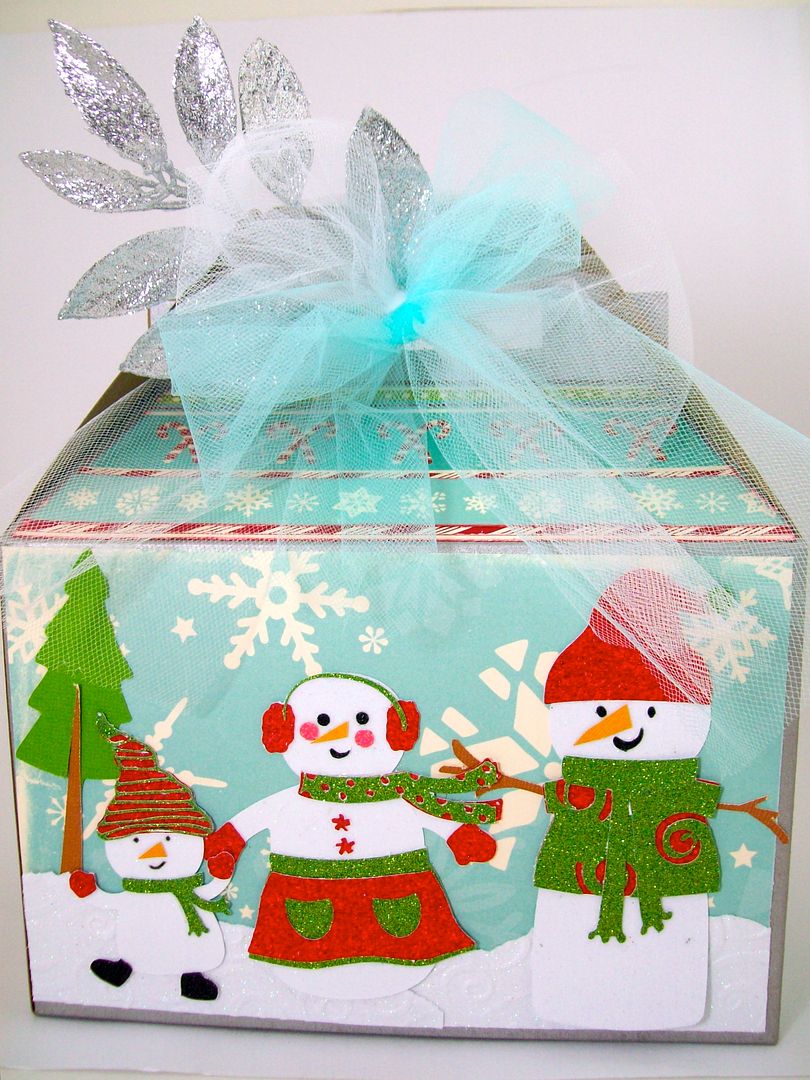
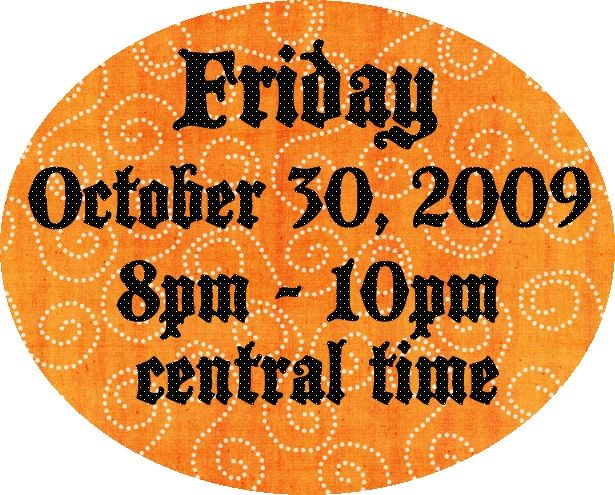
Secondly, check out the above photo and then click HERE to register to win a Gypsy, Gobe Battery Pack, Your Story and more when the Christmas with the Cricut hosts a Spooktacular Halloween live Ustream event on Friday, October 30!!

Thirdly, how about some sneak peeks of the new Winter Cricut Mini-Cartridges?? Click HERE to see some great projects that Melanie, Tammy and I made for the Christmas with the Cricut blog!


And finally, how about a quick pic of the new Destinatiions cartridge? As always, images may change and are property of Provocraft! Linda, over at the Just A Scrappin' blog, posted the screen shots of this cartridge - click HERE to see them! Thanks, Linda!!


Share/Save/BookmarkAdd to Technorati Favorites

Tuesday, June 30, 2009

Cricut Lyrical Letters You're The Best card with cut files


I made this welded frame, bird and "You're the Best" design in the Cricut Design Studio since I thought it would make a handy front for a card. All the pieces are from the Lyrical Letters cartridge. The card I made is actually 6x6 but you could get away with 5x5 or even 5.5x5.5, if you prefer. I would probably give this to someone by hand, rather than mailing, since square cards are more expensive to mail. Another choice is to make a rectangular envelope instead to save on postage. I am not normally too concerned with postage but a square card is almost TWICE the price to mail.

I used My Minds Eye papers - love that they are two sided and coordinating. I inked the edges to distress it even more. Then, I pop dotted the front from the base. All in all, though, a very simple card.

I made the cut file in two sizes, for Baby Bug/Create owners and then for Expression owners.

For the Expression owners, click HERE to download the cut file.

For Baby Bug/Create owners, click HERE to download the cut file.

Enjoy and let me know if you make anything with this!

Monday, June 29, 2009

Cricut Simply Sweet Baby Card with cut files


I decided to use Design Studio to create some baby word art to go on a card. The cartridge already had the "Love" with a Heart on it so I just added the Baby and the diaper pin. I made the cut file of this word art, including the shadowing around it, for both Expression and Baby Bug owners.

I used some American Crafts cardstock for the purple and pink areas and then the Glitter 4x6 Mat Stack (seen below) for the rest of the card. That little mat stack has a TON of cute papers that are just perfect for card making! I added some Stickles on the Baby Love and diaper pin in white (can't remember which white, though..oops!). I also inked around the edges with purple (wisteria) chalk ink and popped up the word art layer. Want to see something interesting? Here is the photo enhanced with my photo software (see below). I think it looks much different. The real card looks more like the first picture. Unless, of course, you prefer this one...ha ha! I had trouble getting a good photo since it's been so dark and stormy here today. In fact, we had a ton of hail and a tree in our yard almost got hit by lightning! YIKES!!


So, for Expression owners, click HERE to download the cut file.

Baby Bug owners, click HERE to download the cut file.

Coming up this week will be more cards and cut files as well as a summer themed word book with cut file! So, stay tuned and stay cool! Whew! It's hot out there!

Friday, June 26, 2009

New Patriotic Word Book made using Cricut Design Studio


If you've wondered why I haven't posted much this week, I've been working on this!

I wanted to make a chipboard book using Stand & Salute! It is fast becoming one of my favorite cartridges because the images are so FUN! So, I created this book using the Cricut Design Studio software. It is done in the typical "word book" fashion and uses Stand & Salute and George cartridges. You can download the link to the free cut file I made by looking below.

A couple of tips when cutting this may help things go smoothly. First of all, tape down all the edges of your chipboard (see below) before cutting it. I love Star Trek so I put that side up on the mat but it really doesn't matter ;-).


I used Design Studio software "preferences" to set my "multi-cut" to 3 times. I also used cereal box chipboard, taking care to use thinner, rather than thicker chipboard. My blade was on 5, speed on LOW, and pressure maximum. Thanks for Scrapping Grandma from the Cricut board, I knew these were the right settings. I also cut all my papers (adjusting the blade depth, speed and pressure as needed) by reloading the mat and then using double sided-cardstock weight paper from Reminisce. This is their new patriotic line that I picked up at the Great American Scrapbook Convention a few weeks ago.

I used many cuts from the cartridge such as all the book edgings, the firecrackers, the "stars and stripes forever", the USA frame, the America the Beautiful cut with shadow, the tag function, the "Liberty" word art, a circle coaster with USA that I created in Design Studio, also in the cut file, and the hat borders.

Download the cut file HERE!

Enjoy!!

Sunday, April 12, 2009

Video on How to Make A Shadow For Your Welded Words in Design Studio

Very clear cut, easy to understand video on how to weld words and then how to make a shadow for those words in the Design Studio program for the Cricut! Five minutes is all it takes to learn this! Woo Hoo!

Happy Easter! Happy Passover! Have a great day, everyone!


Thursday, March 19, 2009

Tips on Welding Words Vertically in Design Studio & Making Scalloped Rectangles

Want to make a welded vertical word in Cricut Design Studio? The FAQ Design Studio blog has a written tutorial on how to do this. Click HERE to see how! This blog has some excellent tips on using Design Studio so be sure and check out her other links and info!

Capadia Designs has had some gorgeous things lately (well, really, as always!) on her blog - including St. Patrick's Day frames and bouquets! Today she has a great post about making a scalloped rectangle in the Design Studio so that you get the "right" number of scallops on the rectangle and it isn't all wonky. See HERE for Diane's tutorial!

If you haven't signed up to subscribe to these blogs, you really need to since they have such good info, all the time!

Saturday, March 14, 2009

Design Studio Pro - Any more news?

A little background is needed here to talk about the upcoming Design Studio Pro release for the Cricut, which is expected at the Summer Craft and Hobby Association (CHA) convention in July. There has been some information out there about this software on the message boards and the latest rumor is that the software will contain the ability to use the fonts on your computer (.ttf files). This is contrary to the video Glenda shot while at CHA, where she interviewed a rep from the Cricut company (see earlier post HERE).

Now, I recently participated in a focus group for a marketing company looking at new Cricut products (which was very fun!). We were asked to evaluate a new product, which was VERY COOL. At no time during the focus group, which included an employee of Provocraft, was there any mention of an upgrade to the DS software that would include the ability to use .ttf fonts. That does NOT mean that it is not possible, just that there was no mention of it at that time. I have expressed my opinion that PC will not head in that direction, as that is a saturated market (Gazelle, Wishblade, Silohette, Klic 'n Kut, Pazzles, etc.). Who knows if that is correct? But all signs indicate that they do not wish to move in that direction as per Glenda's video.

Saturday, January 3, 2009

Grouping Items in the Cricut Design Studio Software

So far, figuring out how to group a set of items to copy, enlarge/reduce, or change as a set has been impossible to figure out. But, Diane at Capadia Designs has put up a tutorial showing how to do this. She makes it look so easy! Thank you Diane! Click HERE to go to her tutorial! Leave her some sweet comments please! This has been impossible to do before now.

Tuesday, December 30, 2008

Cricut Design Studio Welding

Here's an easy way to weld all the letters of a word together in the Design Studio:

1) With the DS open and your cursor set on the mat where you want it, type the first word (all the letters) with no spaces between them. Then, in the kern box, type "-0.25" (without the quotes) and hit the apply button. This will overlap the letters. If they overlap too much, experiment to see what overlap you like by changing the kern number.

2) Then, highlight each letter and click weld.

Here's a tip: To highlight a letter or object in DS, click on a line segment of the letter or object. This will bring up the bounding box (the one with arrows). I spent many frustrated hours trying to get the letters to highlight.

Also, another tip: If you can't get the cursor to move on the mat, adjust your double click speed. It doesn't seem to handle super fast double clicking well. Slow it up a little bit and see if that helps.

One more thing, the DS program only allows ONE computer to cut your creations. So, if you have DS, you can load it on multiple computers, in order to create things, BUT you may only cut with one of them. I assume it is the FIRST one you load DS onto. I am really cranky about this because a day after I loaded DS onto my Windows laptop, it decided it wouldn't take a charge from the power cord anymore. Arrrgghh!

Thursday, December 11, 2008

Cricut Design Studio - How to Make Word Books


Ok, Cricut Design Studio software is on sale at Michaels this week for $60.  And, it is one of the easier ways to create those word books that everyone loves (see photo above).  So, I have been doing some research on exactly how to make those word books and as usual, the internet tells me everything I need to know.  (I love people who are willing to share their knowledge!)

For starters, I found these sites with tutorials on exactly how to make word books.  The end result is a little different amongst the different tutorials, so make sure to look at the photos on the site and see if that is what you want.

Tutorials on Creating Word Books Using Cricut Design Studio:


Now, the blog Everything Cricut and Brandi Gore make a good point of saying, "Hey, as long as you give credit, why not use all the free cut files everyone posts on the internet?  Why reinvent the wheel every time you want to cut something out?"  So, I wondered not only where to find these already designed cut files but also how to download them and get them into the design studio.  Here are some links to help you:


That list of sites with free files is very comprehensive.  It may take me the next week to really look through all those sites.  I'll let you know if I find more goodies.


Friday, December 5, 2008

More Cricut Learning....

The lady mentioned in the previous post also has a site calledLearning the Cricut whereby latest Cricut information is located, with some video and screen shots of how to do different things with Design Studio and the Cricut. Be sure and check it out! VERY informative!

Cricut Design Studio Software HELP

Learning the Cricut Design Studio Software is a website that is offering an e-book for sale, full of step-by-step screenshots of how to use the software and links to over an hour of video tutorials, further explaining the different techniques. Also included is a cheat sheet of sorts, showing shortcuts to create the items you want. This e-book was created by Brandi Gore, who has taught sold-out classes at CK Conventions and her local scrapbooking store (LSS). The people on the yahoo cricutcutter group recommend this book since the manual that comes with the Design Studio does not begin to fully explain all the wonderful things that the Design Studio Software can do for you. The e-book is $37 and has a 60 day money back guarantee. Click HERE to go to the website and read all about it.

I don't usually promote things like this on my blog, since a lot of times much info can be found for free on the internet. BUT, I do know the frustrations of trying to figure out the Cricut in general (hence all the message boards and yahoo groups). I do not receive any monies or such from this post. It is purely informational in nature and may save you a lot of time and frustration.

Sunday, November 30, 2008

Cricut Baby Bug, Cricut Create and Cricut Expression Tips

There were some great Cricut deals out there this past weekend - some should even be good through today! Wait - what is a Cricut anyway? It's a machine that electronically cuts out letters and shapes, utilizing cartridges that are sold separately. It does not require a computer to work, although later I will explain about some software that enhances the Cricut's functionality and will require computer hookup. So, what's the difference between these three machines? Here's the lowdown:

Machines

1) The Cricut Baby Bug or standard Cricut (shown above): It cuts paper sized from 6"x12" and smaller into shapes and letters using the Cricut cartridges. The smallest font size it will cut is 1" and largest is 5.5" and the longest it will cut is 11.5". It weighs around 7 lbs and is very portable. Typically, you can find these new on sale for as low as $99 (Joann's this weekend) up to $184 and they usually come with two cartridges called George and Basic Shapes. You can find used machines on craigslist and ebay for around $100, but usually they do not include any cartridges. Start looking this week because lots of people just upgraded to the Expression and will be looking to sell their machines.
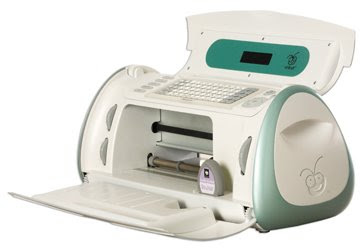


2) The Cricut Create machine, above, is about the same size as the Baby Bug but has some versatility. It retails at $299 but can be found for much cheaper. According to the cricut.com website, here are some of the differences:It allows cuts from 0.25" up to 11.5" on a 6" x 12" cutting mat. The machine also includes an eight-way directional blade, Portrait mode (to cut taller images), Fit to Page mode (to cut the largest cut possible), Auto Fill mode (to mass produce cuts), Center Point function, and Flip function. An improved display screen and sleek design add greater style and convenience. So, basically, you can cut fonts smaller and use some of the functions to make multiple cuts of the same thing easier through autofill. This has a higher price point, is found usually only at Michaels, and comes with the Don Juan font and a shape cartridge.

3) The Cricut Expression, above, is much larger and more expensive than the other two machines. This weekend, it was on sale for $199 at Walmart but is listed at retail at Michaels for as high as $399. Shop around for the best price, as there is a wide variance. It accommodates paper sized 12"x24" (if you purchase a longer mat, sold separately). It comes with a 12"x12" mat. The main differences between this and the smaller cricuts are the ability to use different creative features within one cut (i.e. one letter of one style, the next of another style, etc.) and the ability to make very large cuts by using the 12"x24" mat. Also, the Expression comes with an LCD screen so you can see exactly what is going to cut before the cutting begins, a huge bonus! It comes with Plantin' Schoolbook and Accent Essentials cartridges. It is not very portable, as an FYI.

Training
After you purchase your Cricut, I highly recommend watching the videos on how to use them.

For the regular Cricut, watch Introduction, BasIc Training, and Advanced Training. There are also Maintenance and Design Studio videos.

For the Cricut Expression, watch Intro, Training One, and Training Two.

Tools
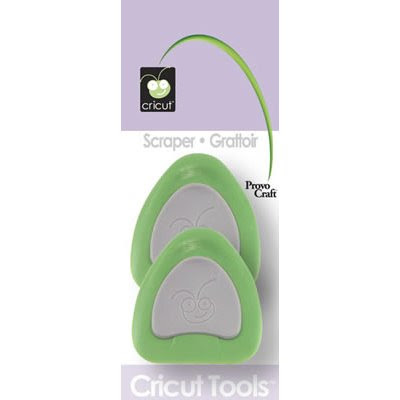
Now that we've cleared up the possibilities, once you've bought the Cricut, what else do you need? I regret to tell you that there are a few more things to buy. One is the tool kit for $25, which has all the tools you could ever need, including some non-essentials like scissors and a ruler. If you wanted to get by, you could individually purchase the scraper ($5.99),
the hook ($5),
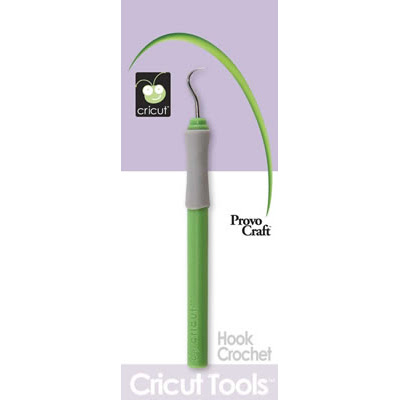
and the spatula ($5.99) OR wait for a sale on Cricut accessories and get the tool kit then. It is really hard to use the Cricut without the scraper, at a minimum. If you have a scraper from Pampered Chef and their stoneware baking sheets, that works also. You will also need a package of mats because they do wear out. BUT, only buy one package, as you can always resticky them by either washing them and letting them dry OR wiping them down with a baby wipe and letting them dry. If that doesn't appeal to you, you can use the quilt re-positioning spray from Joann's.
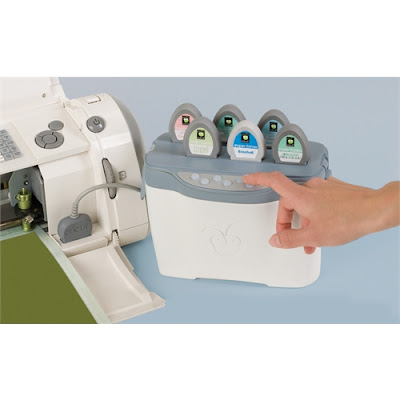

Cricut also made the Jukebox, above, which will hold six cartridges so that you have access to more than one cartridge at a time. You can also link up to three Jukeboxes, thus having immediate access to 18 cartridges at once. It retails for $90 but was as low as $50 at Michael's this past weekend.

Software
Now, what if you want your letters to be welded together, like cursive writing? Cricut created the Design Studio, which allows you to weld your letters together and see a screen where you can modify your text or shape in any direction to get the cut you want. "What you see on the screen is what you get". The Design Studio retails for $90 and hooks to your computer by using a USB cord (A/B style - one end flat head, one end square head - not included). It only works on WINDOWS machines. Although the design studio claims to have all the Cricut shapes in its software, you may only actually CUT OUT those that correspond to the cartridges you already own. There are some excellent tutorials and info on the Design Studio on the cricut.com site. Many people have used the Design Studio to create those shaped word books where each letter staggers into the next (see photo below).


Cricut also allows you to download a free trial of the software to check it out - Free Design Studio Trial.


This post may contain affiliate links, which help subsidize my diet coke and coffee intake, necessary to run this blog.

Copyright

Unless otherwise stated within the post, this is my original work. Please feel free to use as inspiration for your own personal use, but do not use for publication, contest/message board entries, or to sell. If my work inspires a work of your own, please give credit by posting a link to my blog. Thank you! MyFreeCopyright.com Registered & Protected