There were some great Cricut deals out there this past weekend - some should even be good through today! Wait - what is a Cricut anyway? It's a machine that electronically cuts out letters and shapes, utilizing cartridges that are sold separately. It does not require a computer to work, although later I will explain about some software that enhances the Cricut's functionality and will require computer hookup. So, what's the difference between these three machines? Here's the lowdown:
Machines

1) The Cricut Baby Bug or standard Cricut (shown above): It cuts paper sized from 6"x12" and smaller into shapes and letters using the Cricut cartridges. The
smallest font size it will cut is 1" and largest is 5.5" and the longest it will cut is 11.5". It weighs around 7 lbs and is very portable. Typically, you can find these new on sale for as low as $99 (Joann's this weekend) up to $184 and they usually come with two cartridges called George and Basic Shapes. You can find used machines on craigslist and ebay for around $100, but usually they do not include any cartridges. Start looking this week because lots of people just upgraded to the Expression and will be looking to sell their machines.
2) The Cricut Create machine, above, is about the same size as the Baby Bug but has some versatility. It retails at $299 but can be found for much cheaper. According to the cricut.com website, here are some of the differences:It allows cuts from
0.25" up to 11.5" on a 6" x 12" cutting mat. The machine also includes an eight-way directional blade, Portrait mode (to cut taller images), Fit to Page mode (to cut the largest cut possible), Auto Fill mode (to mass produce cuts), Center Point function, and Flip function. An improved display screen and sleek design add greater style and convenience. So, basically, you can cut fonts smaller and use some of the functions to make multiple cuts of the same thing easier through autofill. This has a higher price point, is found usually only at Michaels, and comes with the Don Juan font and a shape cartridge.

3)
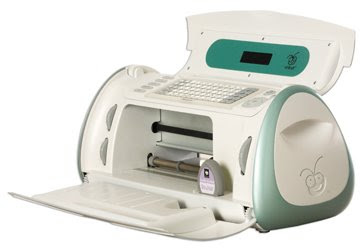
The Cricut Expression, above, is much larger and more expensive than the other two machines. This weekend, it was on sale for $199 at Walmart but is listed at retail at Michaels for as high as $399. Shop around for the best price, as there is a wide variance. It accommodates paper sized 12"x24" (if you purchase a longer mat, sold separately). It comes with a 12"x12" mat. The main differences between this and the smaller cricuts are the ability to use different creative features within one cut (i.e. one letter of one style, the next of another style, etc.) and the ability to make very large cuts by using the 12"x24" mat. Also, the Expression comes with an LCD screen so you can see exactly what is going to cut before the cutting begins, a huge bonus! It comes with Plantin' Schoolbook and Accent Essentials cartridges. It is not very portable, as an FYI.
Training
After you purchase your Cricut, I highly recommend watching the videos on how to use them.
For the regular Cricut, watch
Introduction,
BasIc Training, and
Advanced Training. There are also Maintenance and Design Studio videos.
For the Cricut Expression, watch
Intro,
Training One, and
Training Two.
Tools
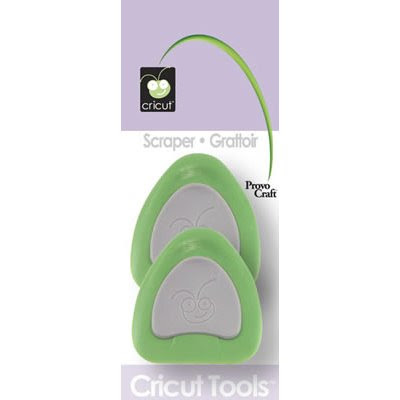
Now that we've cleared up the possibilities, once you've bought the Cricut, what else do you need? I regret to tell you that there are a few more things to buy. One is the tool kit for $25, which has all the tools you could ever need, including some non-essentials like scissors and a ruler. If you wanted to get by, you could individually purchase the scraper ($5.99),
the hook ($5),

and the spatula ($5.99) OR wait for a sale on Cricut accessories and get the tool kit then. It is really hard to use the Cricut without the scraper, at a minimum. If you have a scraper from Pampered Chef and their stoneware baking sheets, that works also. You will also need a package of mats because they do wear out. BUT, only buy one package, as you can always resticky them by either washing them and letting them dry OR wiping them down with a baby wipe and letting them dry. If that doesn't appeal to you, you can use the quilt re-positioning spray from Joann's.
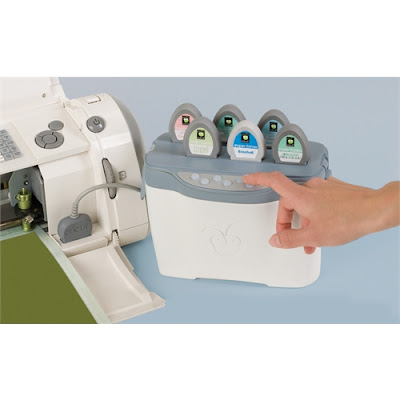
Cricut also made the Jukebox, above, which will hold six cartridges so that you have access to more than one cartridge at a time. You can also link up to three Jukeboxes, thus having immediate access to 18 cartridges at once. It retails for $90 but was as low as $50 at Michael's this past weekend.
Software
Now, what if you want your letters to be welded together, like cursive writing? Cricut created the
Design Studio, which allows you to weld your letters together and see a screen where you can modify your text or shape in any direction to get the cut you want. "What you see on the screen is what you get". The Design Studio retails for $90 and hooks to your computer by using a USB cord (A/B style - one end flat head, one end square head - not included). It only works on WINDOWS machines. Although the design studio claims to have all the Cricut shapes in its software, you may only actually CUT OUT those that correspond to the cartridges you already own. There are some excellent tutorials and info on the Design Studio on the cricut.com site. Many people have used the Design Studio to create those shaped word books where each letter staggers into the next (see photo below).

Cricut also allows you to download a free trial of the software to check it out -
Free Design Studio Trial.
This post may contain affiliate links, which help subsidize my diet coke and coffee intake, necessary to run this blog.


