

Check out this cute bird card Melanie and I made using the new Cricut Imagine machine. For more details, head over to Everyday Cricut!
Below is a video showing how we made this using the new Cricut Imagine Machine!
Also, check out these videos for more info:
Opening the Box of the Cricut Imagine Machine
Loading the Ink Cartridges
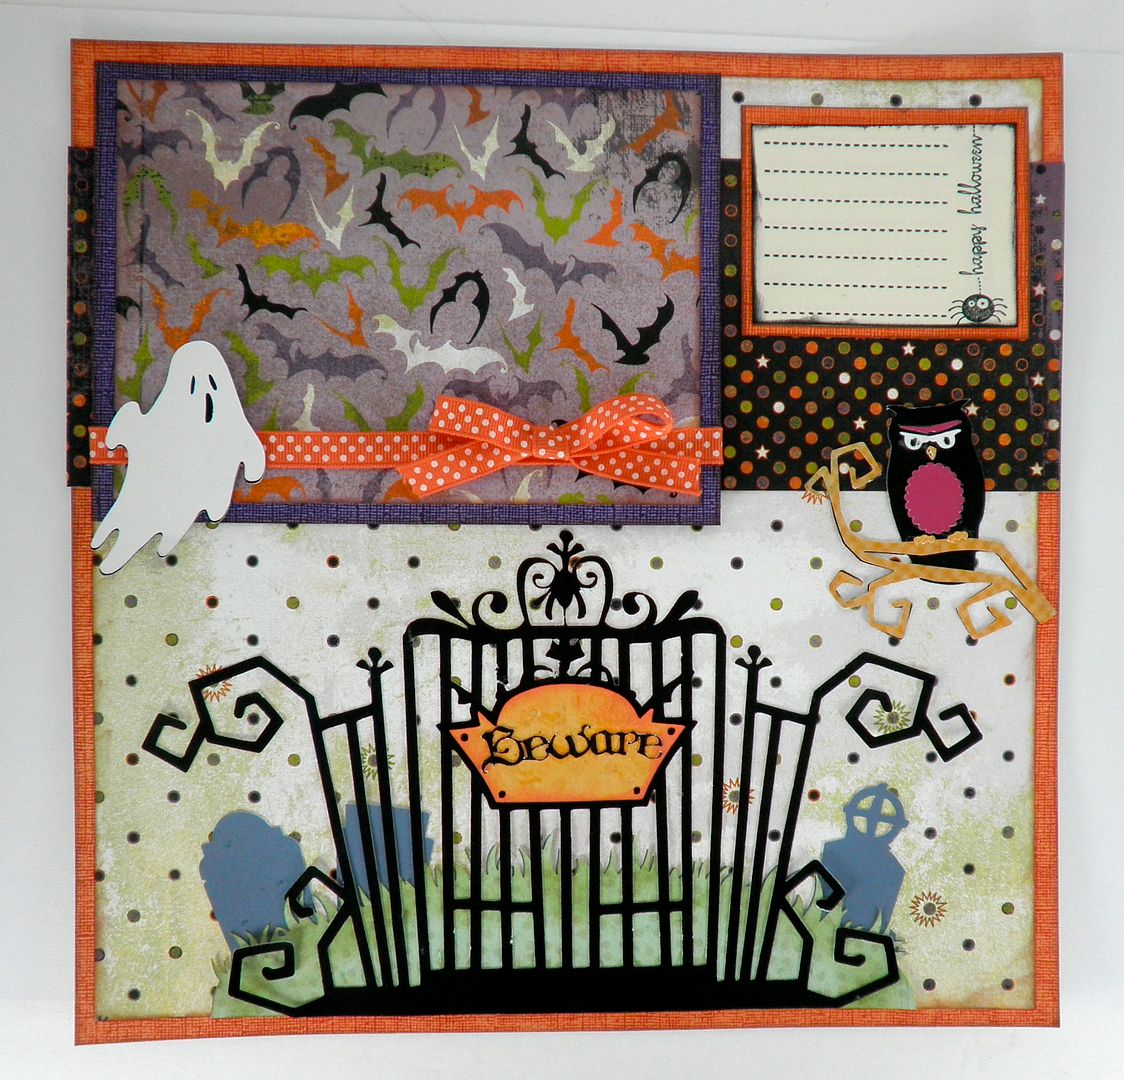
This Happy Hauntings layout was also created for Everyday Cricut! Here's a copy of the Q and A on the machine that may provide some answers for those of you interested in the machine!
1) How much are the ink cartridges? At this time, the black is $34.95 and the color is $39.95. Are the inks refillable? Not at this time.
2) How many sheets will they print? If you printed entire 11.5x11.5 sheets of full color (i.e. used a pattern over the full page to create what would look like a regular printed scrapbook page), we are hearing between 50-75 sheets. If you cut and print a bunch of different images, such as yesterday's project, that number is much higher at 120-150. I am sure it depends on how color intense the images are and their sizing. The machine comes with black and color ink cartridges full.
3) Can you use the Imagine cartridges in the Expression/Baby Bug/Create? No. They have a smaller housing so they cannot fit. However, the regular Cricut cartridges (full size, solutions, lite, cake) will fit in the Imagine and you can either "print and cut" using Imagine colors/regular ink colors or just "cut". You could also put regular scrapbook paper in the machine and just cut the images(same as the Expression/Baby Bug and Create).
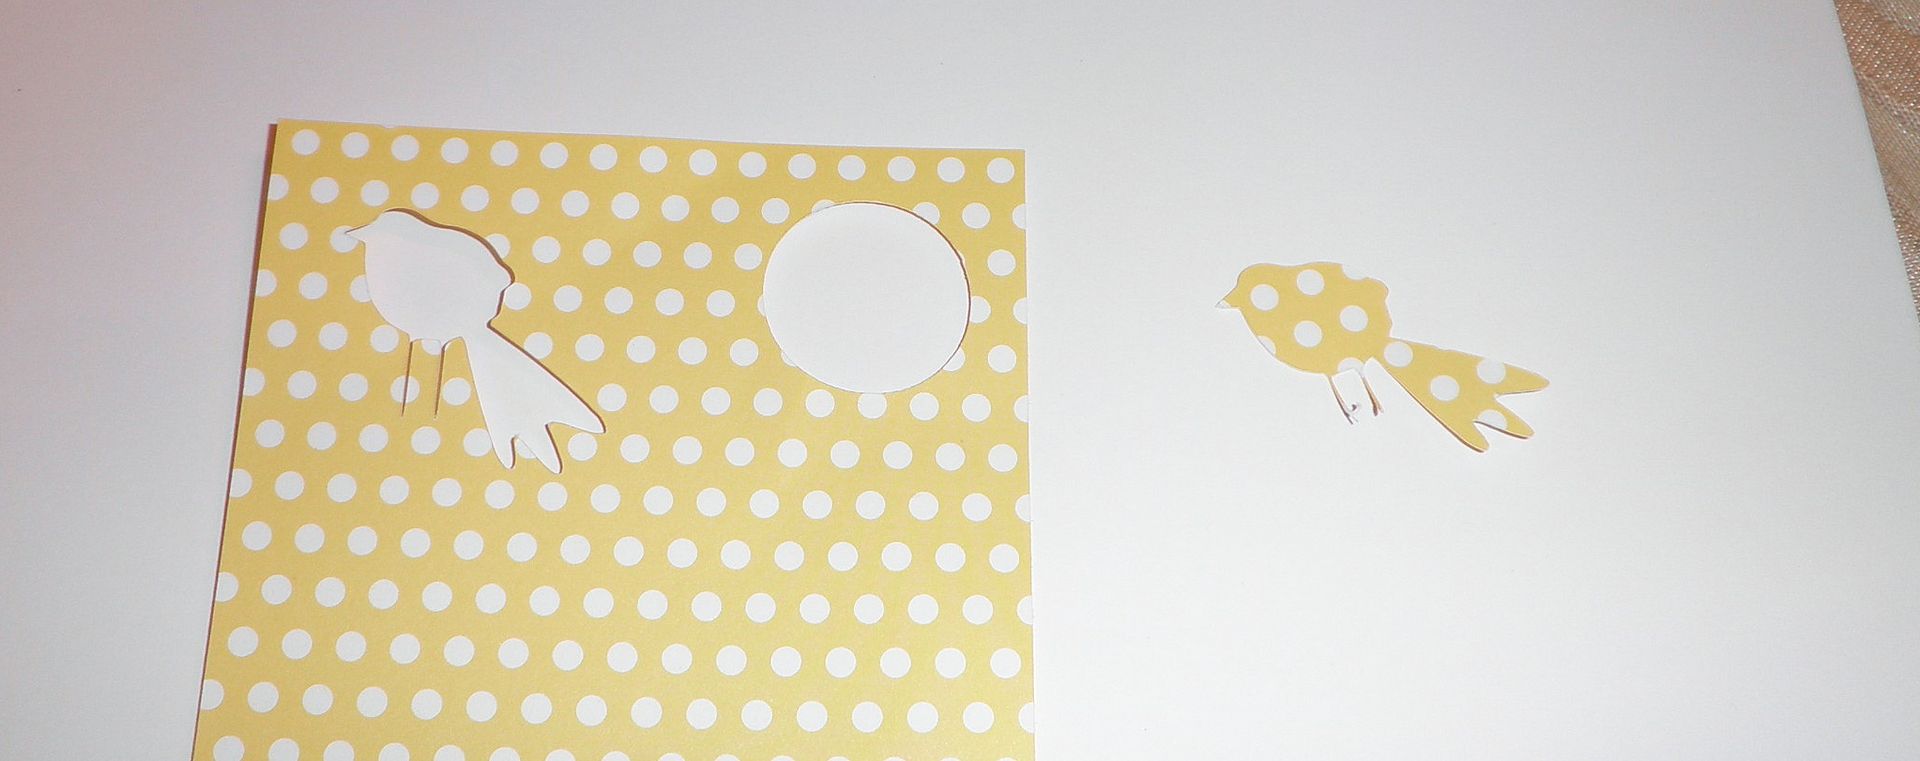
4) Can you mix and match the images from the Imagine cartridge and change the colors? Could I have cut a yellow bird (from yesterday's project) instead of orange? YES! See photos below!
Regular Bird:
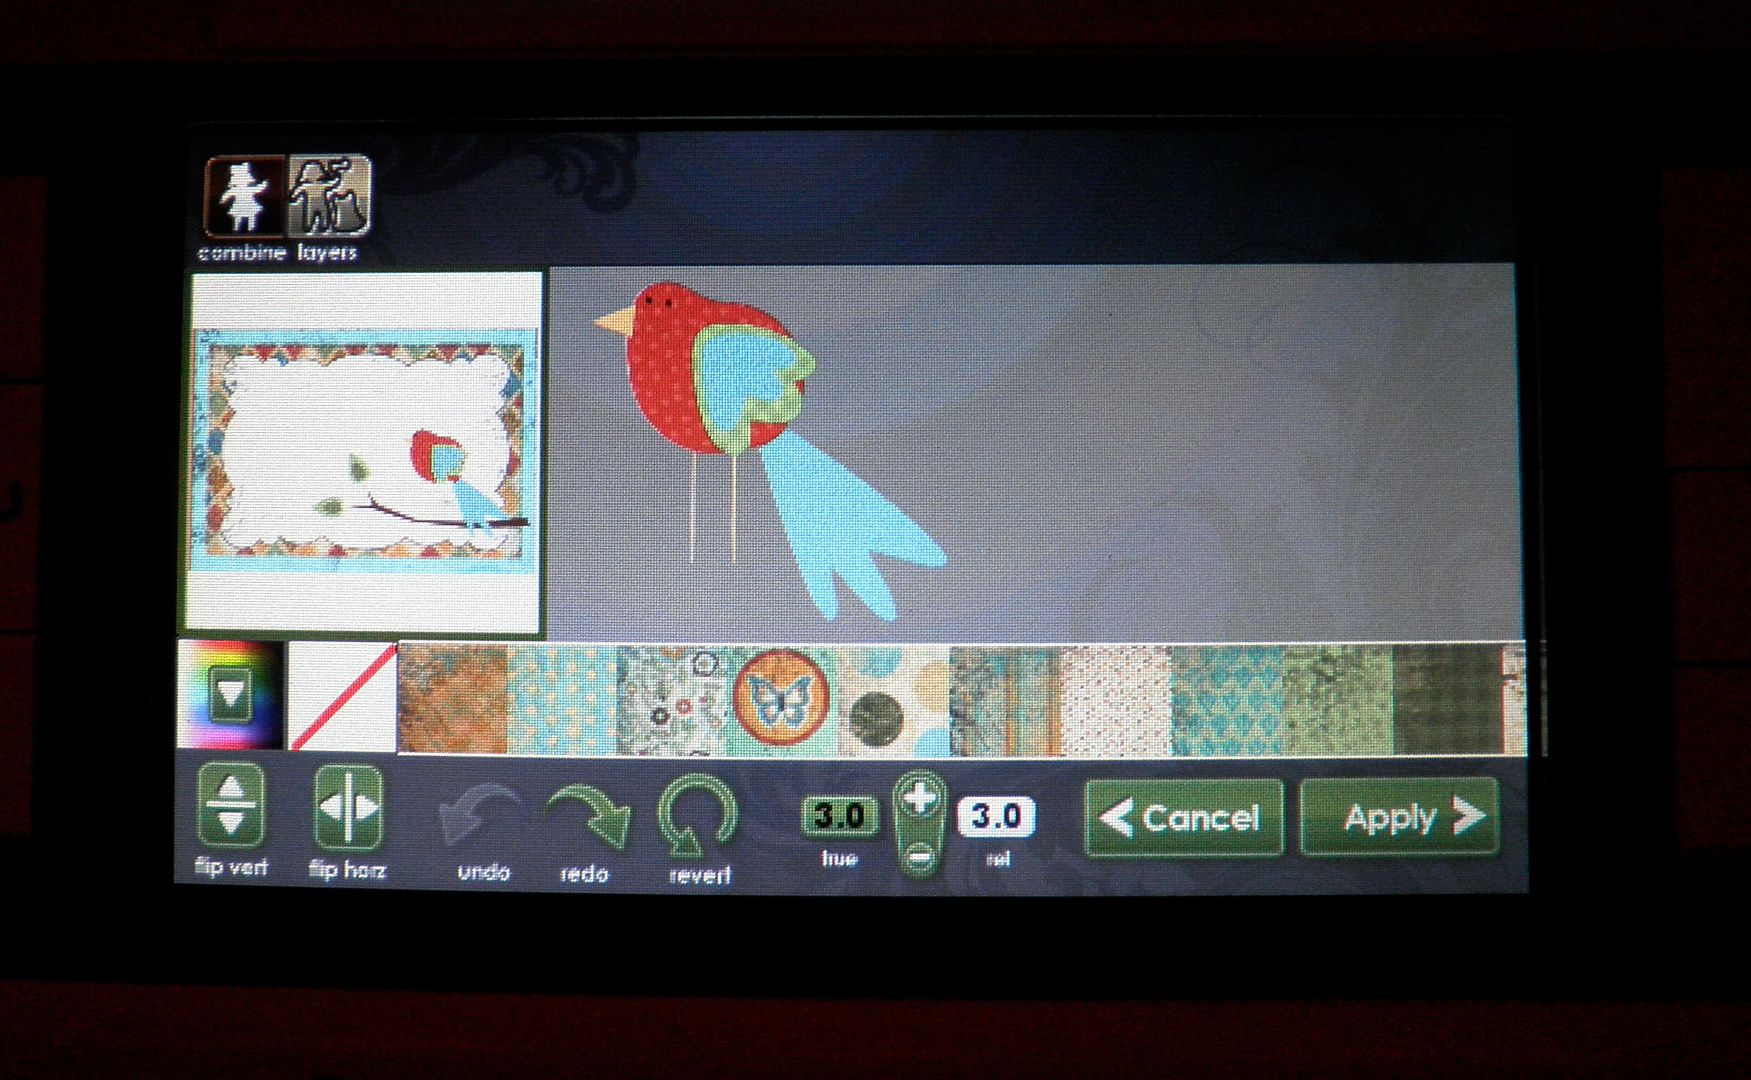
Colored with yellow pattern:
Colored with solid yellow:
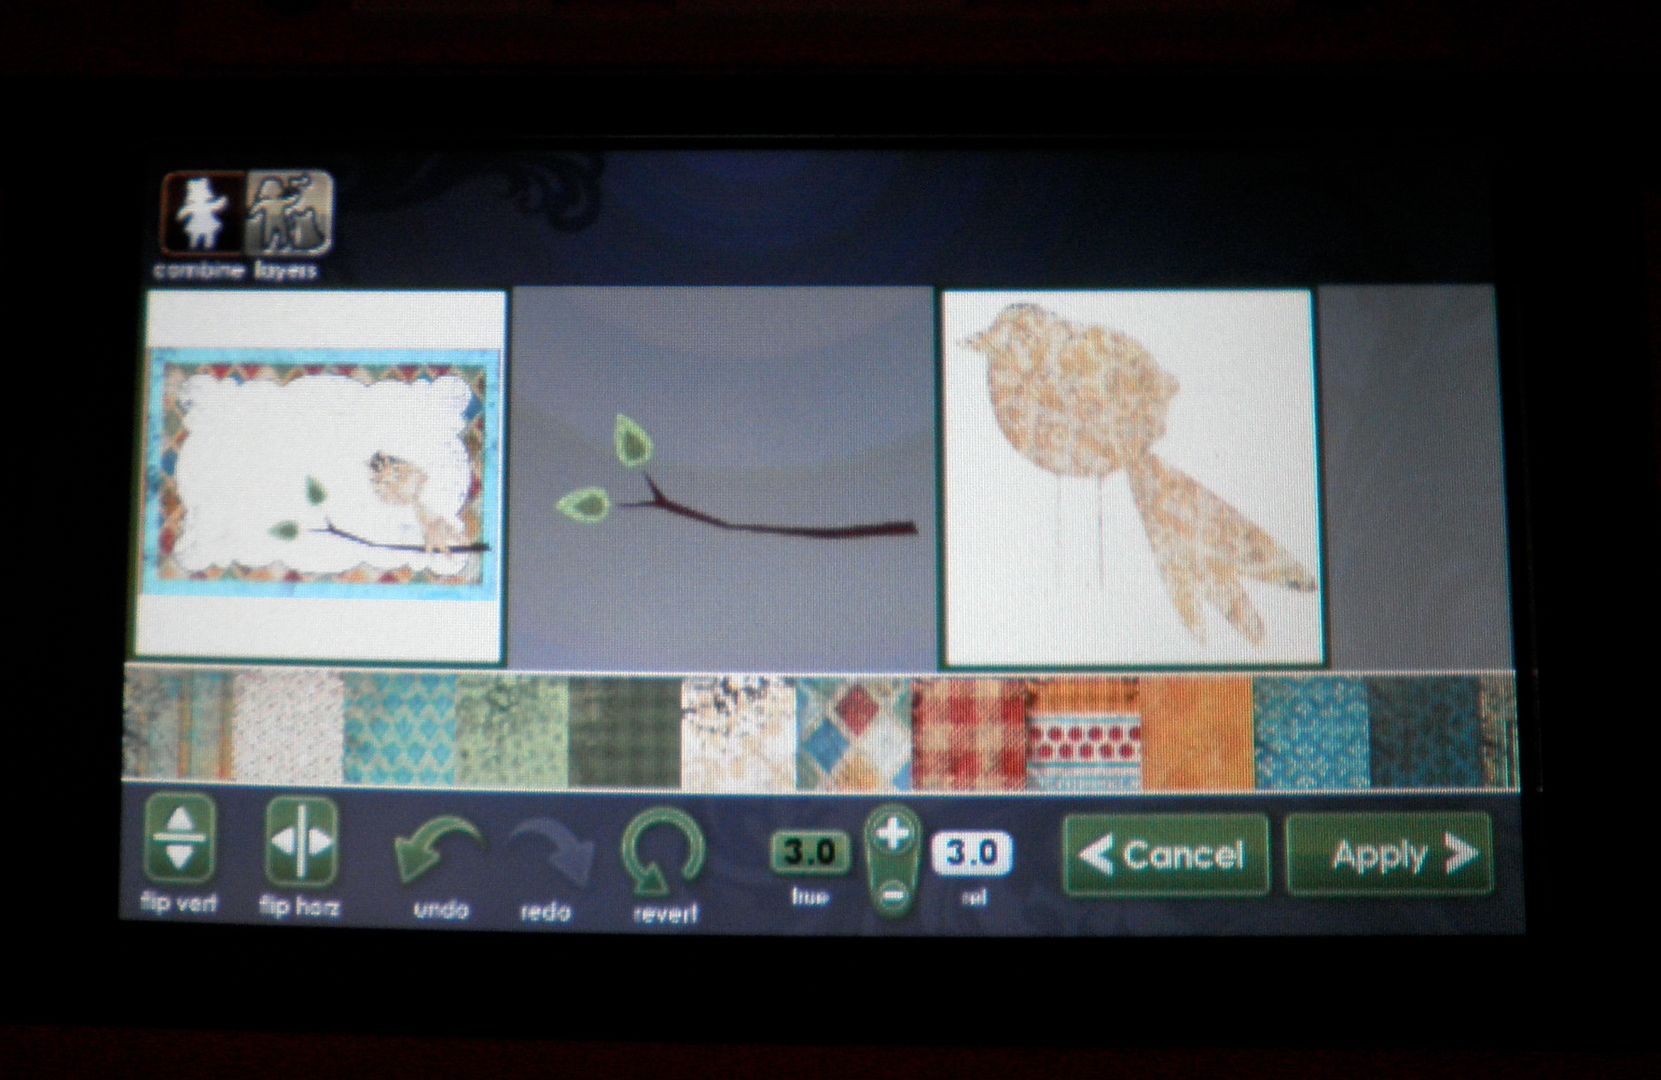
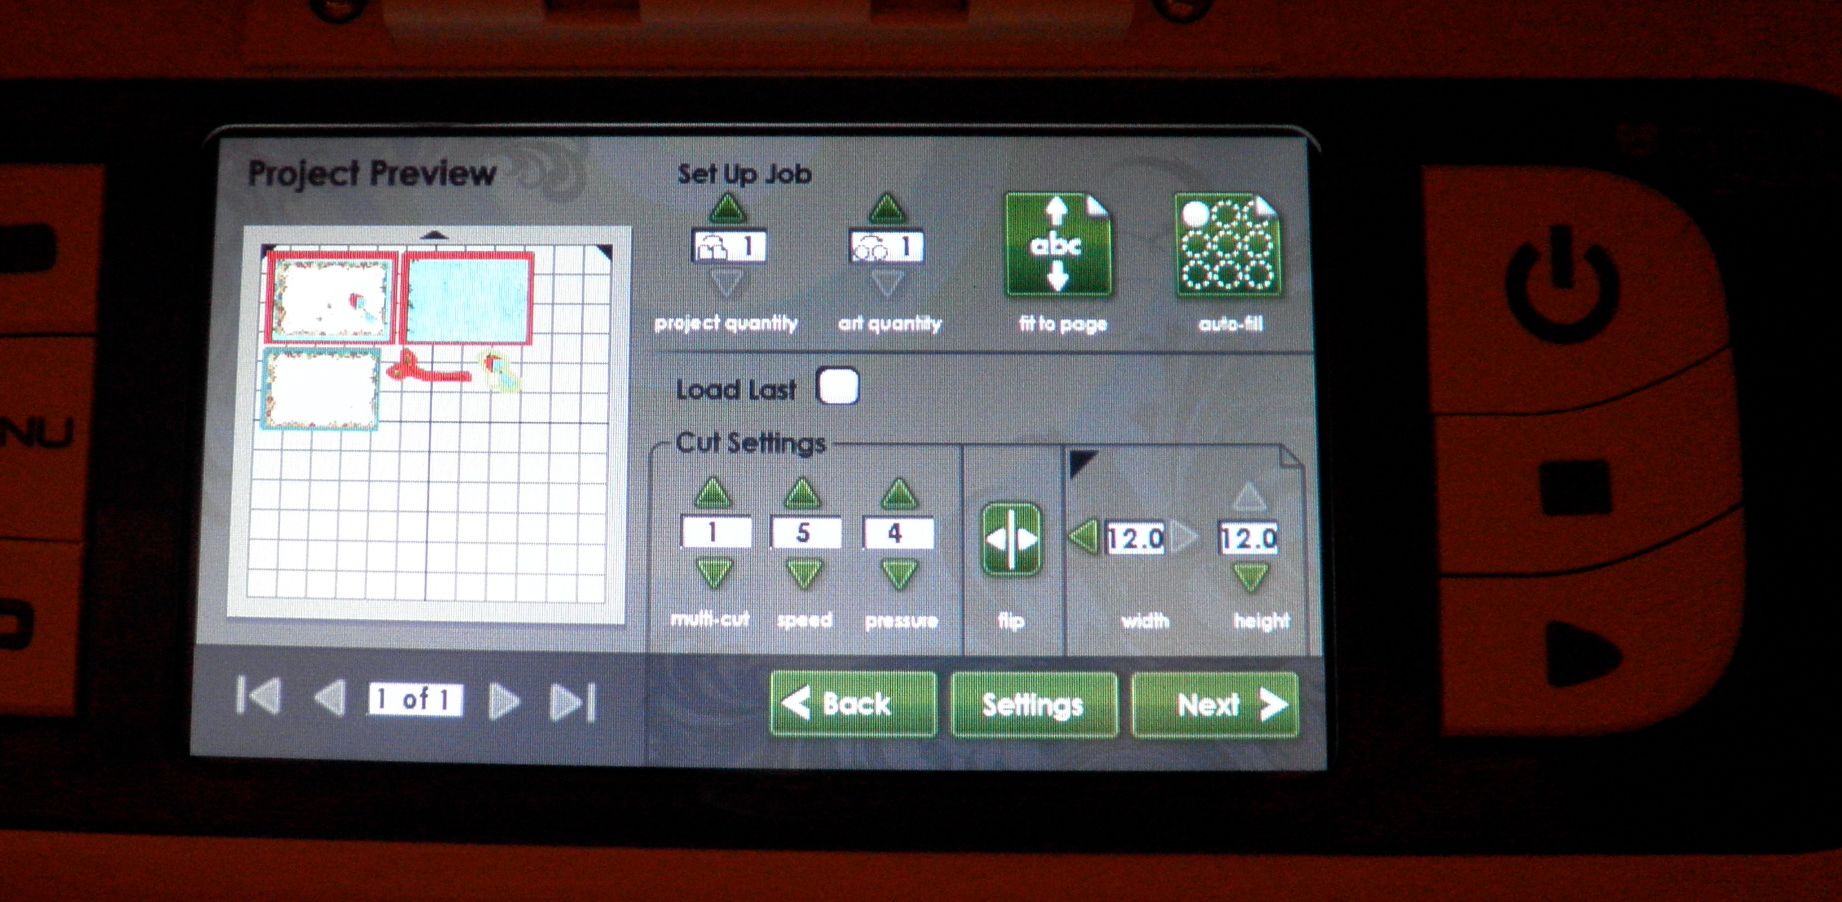
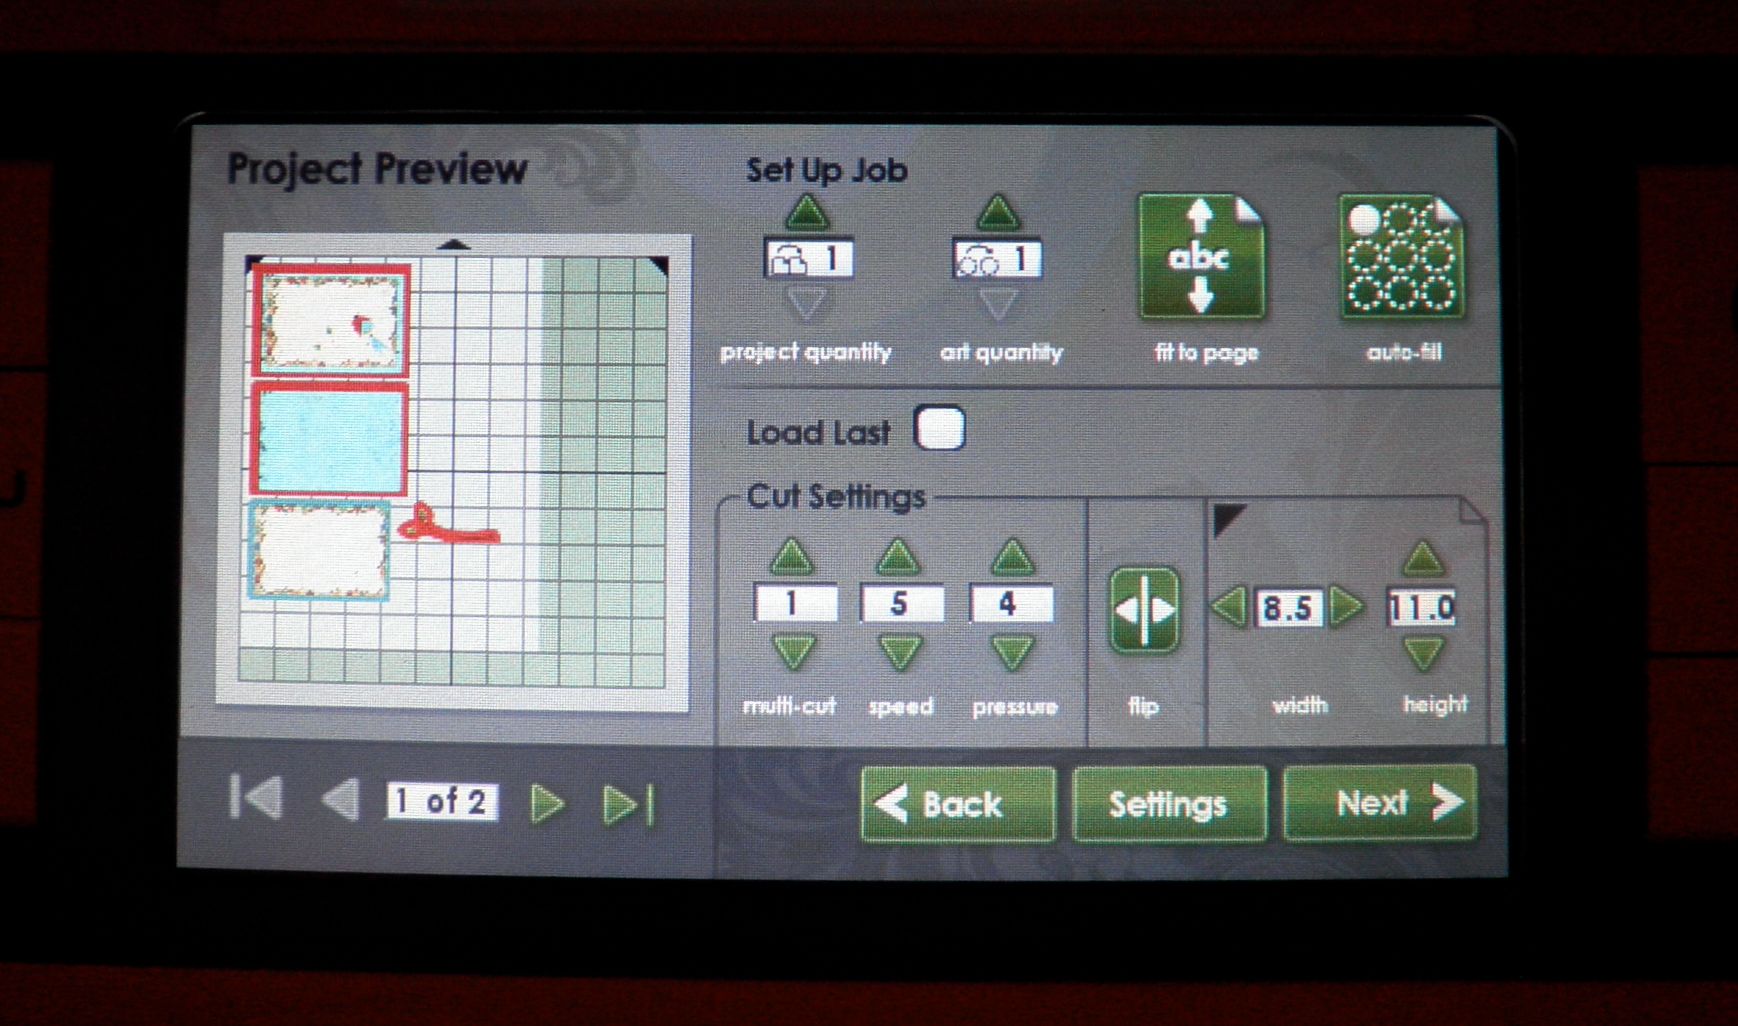
5) Do you have to use a full sheet of paper or can you use smaller pieces? Yes! You can use smaller pieces and there is a place to enter that info and then the machine resizes the preview and rearranges the pieces to fit them. You can also "load last". See photos below:
Using a 12x12 sheet:
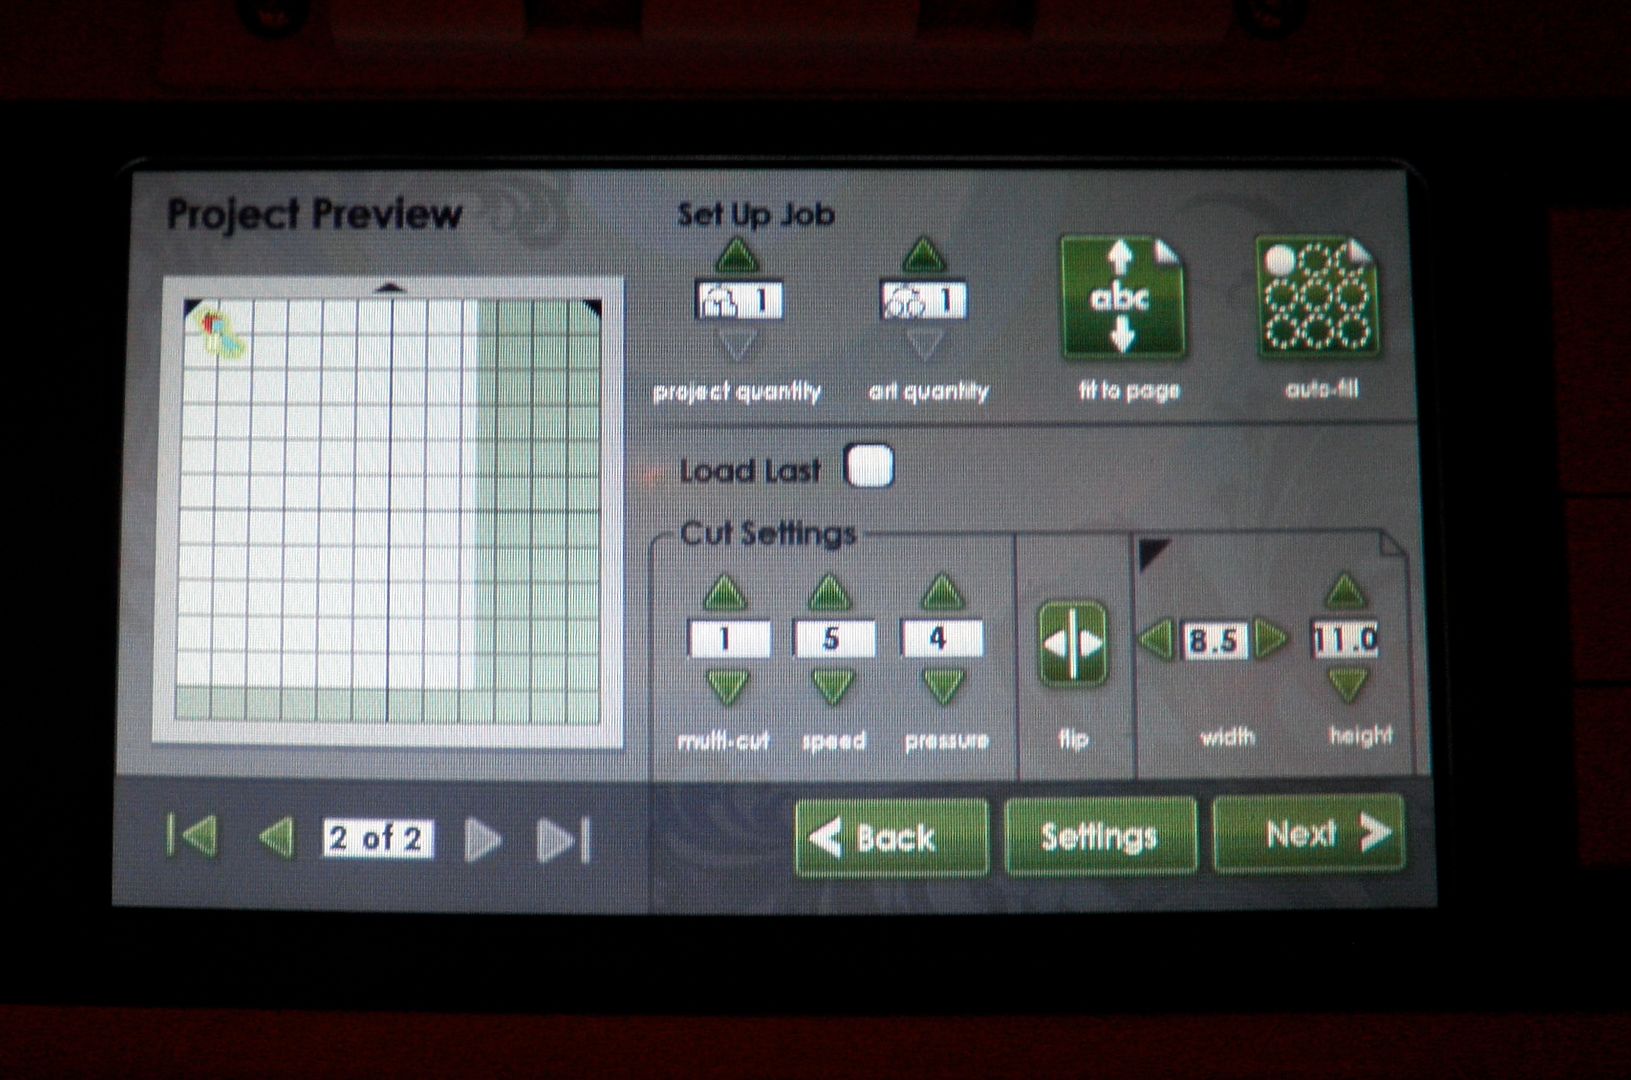
Using an 8.5 x 11 sheet (requires two sheets):
Page 2 of 8.5x11:
6) What type of 12x12 white paper came with the machine? We do not know the brand but it was good quality, smooth cardstock. We also tested the Georgia Pacific white cardstock from Walmart ($6 for 150 sheets of 8.5x11) and some Bazzill embossed cardstock and they all printed and cut fine.
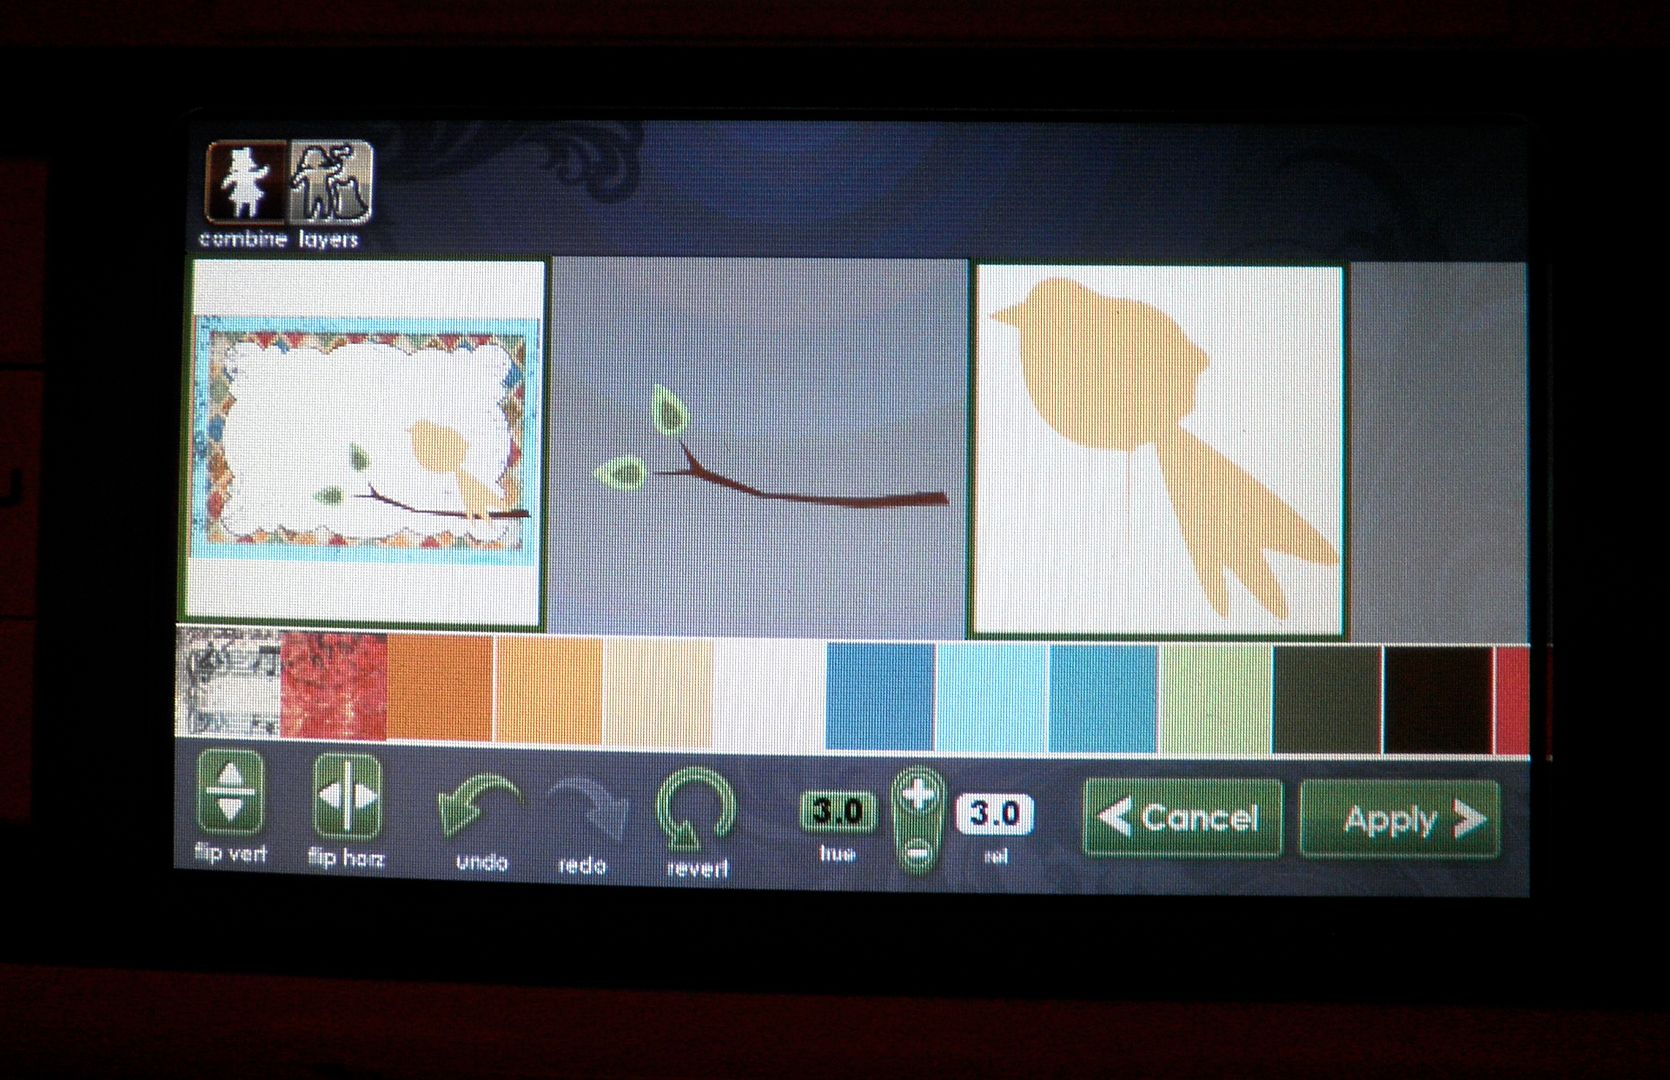
7) So how about if we have the patterned paper already. I am guessing we would have to use white only all the time. We would not be able to cut the bird out of patterned paper I already had? NO! You can do it. You can select an outline only button and it would cut the outline of the bird. See photo below.
8) What is the difference in the mats and can they be used in the regular Expression? The main differences are that these mats have a new glue to them and that they have thick black edge markings around them to tell the machine where to stop printing. They will work in the Expression. We were told that these will be the new standard mats for all machines eventually.
I will have a new project up tomorrow here with video and a different one over on Everyday Cricut. All projects were completed by Melanie (Courtney Lane Designs) and myself together!
Remember, the HSN launch for the Imagine Machine is on Tuesday, September 14!
Subscribe to Obsessed with Scrapbooking to learn more about ways to use the Cricut in your scrapbooking!


Again, wonderful information you've shared, and great projects. Thanks!
ReplyDeleteThe more I see this machine the more I want it! Thanks for sharing your craftyness! cathy at cmwirt at verizon dot net
ReplyDeleteGreat projects, thanks for the information.
ReplyDeletethanks for the info.
ReplyDeleteThanks for answering some important questions about the Imagine
ReplyDeleteThanks for the Q&A's...very helpful!
ReplyDeleteMaybe someday one will be given away??? Just wishing!!!!!!!!!!!!!
ReplyDeleteThanks for the q&a's; very helpful!
Thanks again.
Mstgane
Ann
FABULOUS!!! Great projects Joy :)
ReplyDeleteHugs, T
I LOVE that layout! The gate is absolutely fantastic. Great job!
ReplyDelete(Super card, too, but I already commented on that at EC.)
You gals are the greatest! Thank you so much for sharing!
ReplyDeleteCooler than I thought! Oh dear!
ReplyDeleteThanks for sharing
Susan
Great cards!
ReplyDeleteSo exciting! Wonderful projects! :)
ReplyDeleteLove the projects you have made so far :) Cannot wait to see more.
ReplyDeleteGreat info, Very cute card.
ReplyDeleteTFS!!
Very interesting questions and answers---Thanks for doing that!
ReplyDeleteRoxanna
bswinch at aol dot com
How fun...thanks for sharing the great info on the imagine
ReplyDeleteGreat projects! The imagine is definately on my wish list...but it will not be purchased this year...until the time comes I will just watch your creative self and dream. :)
ReplyDeletewonderful information you've shared, and great projects. Thanks!
ReplyDeleteBut I have a question does it cut better then our CE. or is it the same.
Thanks Debbie
Great! Thanks for sharing the info...I really can't wait to get this machine!!!
ReplyDeletethanks love it and can not wait to see more
ReplyDeletemcwooten1999@carolina.rr.com
So cute! Thanks for the videos!
ReplyDeleteThis card is darling!
ReplyDeleteBlessings, Donna
Can you combine parts from different images? Like use the kite bit in the frame with the armadillo?
ReplyDeleteCan you connect it to the Gypsy yet?
Ohh and what happens if you spritz it with something like Glimmer mist?
Those are my questions for now :D. It looks like you all are having a great time!
Now why would you go and show the step by step and make that adorable card?!?!?! Now I REALLY want this dang machine!!!
ReplyDeleteoh Joy, it looks like you are having so much fun experimenting with your new baby! thanks for sharing.
ReplyDeleteThanks for the videos and the Q&A sections. I'm sure that there will be many many more questions! But we know who we can turn to for the answers!
ReplyDeleteShellee
Thanks for all the info you are sharing on the Imagine! And the Halloween LO is great!
ReplyDeleteGreat inormation...thanks.
ReplyDeleteI really like the layout and I absolutely NEED a Imagine. Thanks.
ReplyDeletesyoung6987@aol.com
What a great layout, and thanks for all the answers/information that'll come in handy and that I'll need... one of these days!!! LOL! TFS!
ReplyDeleteYou are so talented I love getting all your help. Thanks!
ReplyDeleteI think I am in love with a machine!!!
ReplyDeleteThanks for these great demos and especially the q and a's. Here's more questions...
ReplyDeleteIs there a calibration option if your prints and cuts are not lining up? Can you cut Cricut magnet stock? Cricut stencil material? Shrinky Dinks? (trying to think of things that are a little stiff like chipboard)
thanks for sharing all this info with us...
ReplyDeleteGreat job! I must say extra thanks to you for showing pictures of the project and not just a video. I really appreciate it!
ReplyDeleteThese are SO cute!!!
ReplyDeleteAdorable project; thanks for sharing your creations and the info about the Imagine!
ReplyDeleteOh nooo I was thinking I didn't have to have this and now...........I WANT ONE lol thank you so much for the video!!!!
ReplyDeleteOh oh oh!! be still my heart! Love the possibilities and options available with the imagine! Tooooo much fun coming our way!
ReplyDeletethanks for all the info and the cute project. I love how you added the stitching... I seem to always forget that I can do that. :)
ReplyDeleteThanks for all your great ideas!
ReplyDelete