Showing posts with label Cricut - Iron On Vinyl. Show all posts

Wednesday, April 24, 2013

How to Layer Cricut Iron On Vinyl!


Pin It

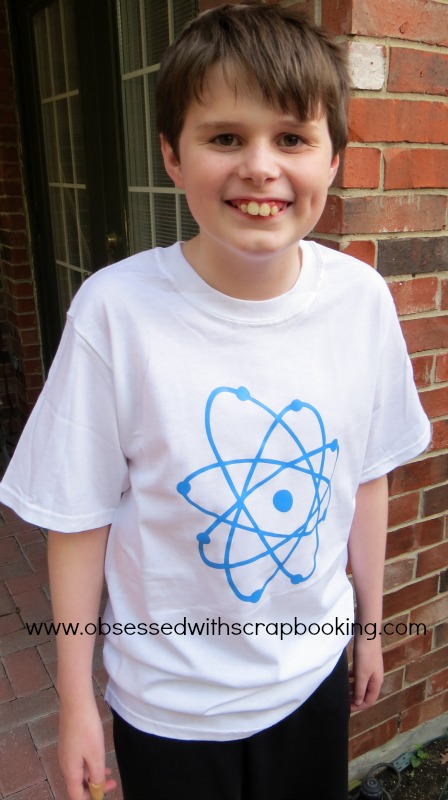
Today's T-shirt features layered iron-on vinyl!  It was incredibly easy to do.  Just follow these steps:

1) Iron shirt where vinyl will go for 15-20 seconds using highest, non-steam setting.

2) Place bottom layer of vinyl (yellow star layer in this case) onto shirt, with its plastic backing intact.  Using a iron cloth over it (I used a pillowcase), iron for 15-20 seconds.  Then, turn shirt over and iron the backside for 15-20 seconds.

3) Remove plastic backing from bottom layer.  Carefully, place top layer onto bottom layer, with its plastic backing intact.  Use parchment paper to cover bottom layer and prevent trouble.  Now iron with your iron cloth over both layers for 30 seconds on front.  Turn shirt over and iron with iron for 15-30 seconds.

4) Wait until vinyl cools and remove plastic backing and parchment paper.  Shirt is finished!

One last tip:  You cannot layer on top of the glitter vinyl -that must be the top layer!

The "Rock Star" was cut from the Cricut Rock Princess cartridge at 5".  That cartridge has some great word art that's perfect for iron on vinyl layering.  Here's a link to the handbook: Cricut Rock Princess Handbook

Here are all the cool Iron On Vinyl colors Provo Craft has come out with - they are $12.99 each.
We've only got a few more days left to sign up for the May Layout a Day class! I hope you will join me in doing this class.  I am a little nervous about doing so many layouts but I really want to do this!  Here's some more info on the class:

Want to make 31 layouts in 31 days?

Lain Ehmann is running her "Layout A Day" class again in May.  Join me as we take on this fun class together!  Daily video and daily prompts are a great spur to action.  I am hoping to learn how to make layouts faster.

Here are the details:
What’s Waiting for You in May:
  • 31 days of brand-new video prompts and lessons, guaranteed to bust you out of any scrapbooking rut, bring a smile to your face, and make your hair shine!
  • Exclusive message board for LOAD members only where you can connect and chat with the coolest scrappers on the Web!
  • Private gallery for our members where you share your daily creations, win prizes, and strut your stuff!
  • 31 never-before-seen sample layouts!
  • Random surPRIZES, Hugh sightings, and fun for all!
SPACE IS LIMITED!
To Preserve the Intimate and Personal Atmosphere of This Event,
Participation Is Capped!

Click here to sign up! 

Here's what others have to say about Layout A Day:
“Before I did LOAD I would spend hours on a page. Now because LOAD is on during one of the busiest times at work (16 hour days!) I’m scrapping quicker, not afraid of committing, and best of all using up all my old stash! I’m loving the prompts scrapping stories I wouldn’t have thought of. I’m seeing a style and what I enjoy using on my pages.”-learncreatedo
“I am having SO MUCH FUN with LOAD!!! I’ve been pushed to go beyond what I thought my creative limits were and I can’t thank you enough for that. I look forward to your email every morning and I always want another prompt as soon as I finish my daily challenge. Thank you so much for this awesome challenge; this LOADster is absolutely loving it!!!”-Jennifer.
Click here to sign up! 

Want to see more of my projects?
Click HERE to see my gallery!
Subscribe to Obsessed with Scrapbooking to learn more about ways to use the Cricut in your scrapbooking! Share/Save/Bookmark

Tuesday, April 23, 2013

New Cricut Iron On Vinyl Atomic T-shirt Project

Pin It
Provo Craft has come out with two new cartridges, specifically designed to go with their new Cricut Iron On Vinyl!  They are called Cricut Brooklyn Iron On and Cricut Boho Graphics and both retail for $29.99.

To make a cute t-shirt for my son Robbie (shown above), I used the nuclear/atomic image on this T-shirt from the new Cricut Brooklyn Iron On cartridge - check out some of the other fun images on this cartridge:
I love all the nerdy images on this cartridge!  I am so making a "pi" shirt for next year's Pi Day (nerd that I am...).  But how cute would that tie or glasses, mustache, bowtie look on a boy's onesie!?
Provo Craft has conveniently created a page on their website to see all about the iron on vinyl, including instructions and projects - check it out HERE.

The number one piece of advice is to FLIP your images - don't forget!  That's a project killer.  Also, just follow the instructions that come with the vinyl.

I found the iron on vinyl easy to work with overall.  Most difficult is that I found the setting for the pressure on the Expression was a little too heavy and ended up partially cutting through the clear sheeting, which made the weeding (removal of parts you won't iron on) very tough.

In the end, once I was past the weeding toughness, it was quite easy to iron on and the results were quick and smooth.

Tomorrow, I will show you a project where I layered the vinyl and used the glitter vinyl also.  I LOVE the glitter vinyl!  It is really glittery!

Here is a peek at the Cricut Boho Graphics cartridge:
Here are all the cool Iron On Vinyl colors Provo Craft has come out with - they are $12.99 each.
What do you think of the new cartridges?  Do you like iron on vinyl?  Have you used it before/a lot?

Want to see more of my projects?
Click HERE to see my gallery!
Subscribe to Obsessed with Scrapbooking to learn more about ways to use the Cricut in your scrapbooking! Share/Save/Bookmark

Monday, April 8, 2013

Introducing Cricut Iron On Vinyl!

Pin It
Provo Craft has come out with iron-on vinyl! 

They sent some vinyl for me to try and asked that I make a home decor project.  I saw a similar pillow design at JC Penney and decided to see if I could make it in the Cricut Craft Room.

Using the flowers from the Cricut Bloom and Cricut Create A Critter cartridges, and the shapes from the Cricut Basic Font and Shapes, I was able to layout the design quickly.
Below is a guide to putting the vinyl on the mat so you get it right the first time.  If you ever are worried about how to do it, be sure and try a very small cut out and see how it goes.
The instructions that come with the vinyl were very thorough and told what settings to use for which machine.  The guide above is for the regular Expression machine.

My pillow case came from Ikea and was $6.  The iron on was easy to use and the instructions were good.  The only difficulty I had was in doing the layers.  I needed to trim out the sections better, which I discovered through trial and error. 


Have you used iron on vinyl?  Let me know in the comments!

One last thing:

The winner of the "You Pick A Scrappy Moms Stamp set" is:

Scrappin Dilly!

Congratulations, Scrappin Dilly!  Please email me at joyster110@gmail.com within 2 weeks to claim your prize.

To see the Scrappy Moms stamp sets, click HERE!

Check back tomorrow for next week's giveaway announcement and another project.

Want to see more of my projects?
Click HERE to see my gallery!
Subscribe to Obsessed with Scrapbooking to learn more about ways to use the Cricut in your scrapbooking! Share/Save/Bookmark

Copyright

Unless otherwise stated within the post, this is my original work. Please feel free to use as inspiration for your own personal use, but do not use for publication, contest/message board entries, or to sell. If my work inspires a work of your own, please give credit by posting a link to my blog. Thank you! MyFreeCopyright.com Registered & Protected